Presets and animators
Apply a ready-made animation from the library, adjust its layers in the inspector and save your own set of layers as a preset.
A preset is a finished piece of motion. Inside, it is one or more animators: layers that each do one job, such as moving letters, fading them in or changing a font axis. You click a preset to put its animators on an object, then change any of them in the inspector.
Apply a preset
- Open Presets in the left rail. The panel that opens is the Library.
- Select the object you want to animate. The line under the Library title shows where the next preset goes, for example
Applies to: Text “Hello”. With nothing selected, presets go to the top text layer. - Click a card.
The library hides cards that do not fit the kind of object you have selected, so with an image selected you will not see text-only presets. One exception: if the selected font has no variable axes, the axis cards stay in the list, dimmed, with a no axes badge, and clicking them does nothing.
Select several objects and one click applies the preset to all of them. If some of them cannot take it, they are skipped and a note says so, for example Applied to 2 of 3 — the rest are not supported.
Some cards have small variant buttons in the top-left corner. Pick a variant first, then click the card.
Cards marked Pro, today most 3D cards and the custom path, are part of the Pro plan. Without Pro, clicking one opens the upgrade dialog instead of applying it.
To find a preset, type in Search presets… or use the filter chips under the search field. If nothing matches, Clear filters brings the full list back.
Combine presets
A click adds layers. It does not replace the ones already there, so two presets on one object run together.

Adjust a preset in the inspector
The layers of an applied preset appear in the Animators section of the inspector. A preset with several layers shows as one group named after its card, with the number of layers next to the name. The group header has two buttons:
- the copy button (tooltip
Copy all layers of this preset) copies the whole preset. Select another object and click the paste button at the top of its Animators section. It shows how many layers it holds, for example Paste (2). - the cross (tooltip
Remove the whole preset) removes every layer of the preset at once.
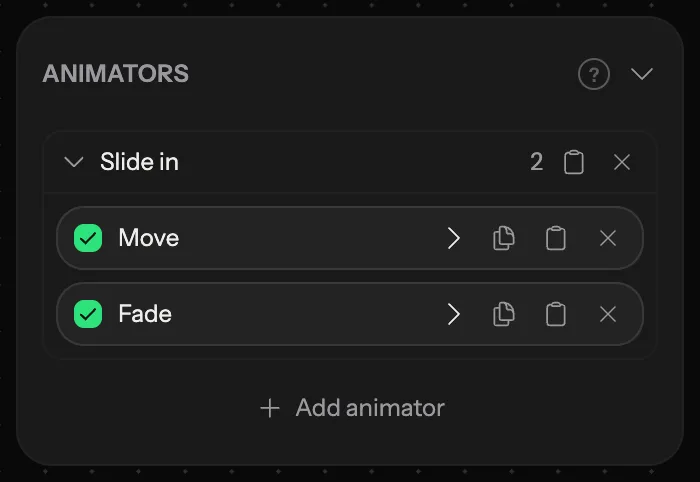
Each layer is a card of its own. The checkbox turns the layer off and on. Click the layer name to open its settings. The buttons on the right duplicate the layer on the same object, copy it for pasting onto another object, or delete it.
To add a single layer without a preset, use Add animator under the list.
Save your own preset
- Select the object whose layers you want to keep.
- In the library, click Save preset next to the Presets heading. It stays greyed out until the object has at least one animator.
- The Save preset dialog lists every layer on the object, all ticked. Untick the ones you do not want.
- Type a name under Preset name and click Save. The button shows how many layers go into the preset, for example Save (2).
Your presets appear under Your presets at the end of the Presets block, before 3D and Path, and the Yours filter chip shows only them. Click one to apply it like any other preset. To delete one, hover over the card and click the cross in its corner.
A few things to know:
- A preset keeps each layer's settings, including its sound.
- A layer that was turned off when you saved it comes back turned on.
- Saving under a name you already used replaces the old preset with that name.
On a format version, the animators of an object can differ from the main artboard. See What a version can change on its own.
Gallery presets
Galleries have presets of their own. They live in the Gallery tab of the left rail, not in the library.
- Open Gallery in the left rail.
- Click a gallery type. If the type has presets, a list opens with Default and the presets.
- Click a preset.
With a gallery selected, the preset changes that gallery: your pictures and its size stay. With no gallery selected, it adds a new gallery. Default takes the type back to its starting settings. The arrow at the top goes back to the list of gallery types.